Terminal and Java
In the last module, we talked about how Java works. In this module, we’ll show how to manually compile and run Java, no IDE needed!
Contents
Until now, you have likely used an IDE, like Eclipse or IntelliJ, to handle compiling. And most of the time this is exactly what you will do. However, I often find students who think Eclipse/IntelliJ is Java, or that you have to have an IDE to compile code. And this isn’t correct!
Think of the IDE like AAA. If you have a flat tire, AAA will send a truck out to change your tire. However, it’s also worth learning how to change a tire yourself. In that same way, let’s look at how to change a Java tire.
Terminal/Powershell
First, we need to become familiar with a very important tool: terminal (or on Windows, Powershell1). IntelliJ, the recommended Java IDE for the course, has a built-in terminal.
If you are already comfortable using a command line terminal, then you can skip this section.
Often times, it can be easier/more efficient in terms of developer time to use basic command line tools rather than looking for a GUI (Graphical User Interface).
While there are tons of commands out there, we’re only going to focus on two right now.
ls
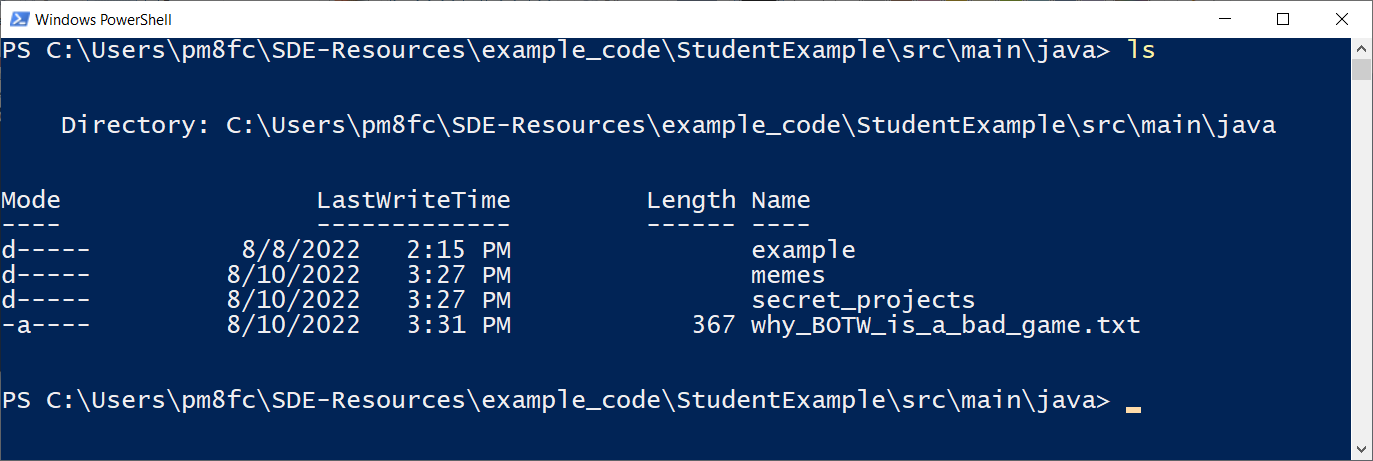
ls is a command for “long listing,” or printing a list of the contents of the
directory you are currently in. For example, I have pictures
below from the Prerequisite knowledge module
open in Windows Powershell below:
This means that in my terminal, I am currently in the folder:
C:\Users\pm8fc\SDE-Resources\example_code\StudentExample\src\main\java
I can list all of the files and directories in that folder using
the ls command.
cd
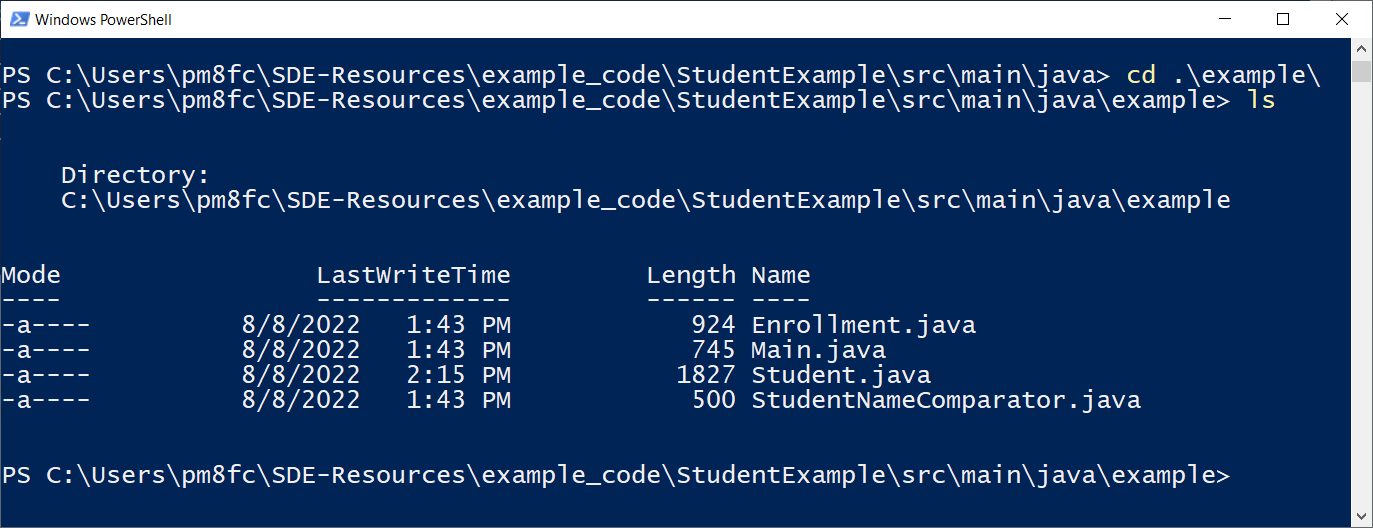
cd stands for “change directory.” Let’s say I wanted
to look in the example sub-folder above. Well, I can
simply use the command:
cd example
to enter that directory. The below picture shows the cd
command in the same folder as before, drilling down to the
example folder. I then run an ls command to list the
directory contents.
It’s worth noting that if you type cd ex and then hit
the Tab key, terminal will auto-complete example
since that is the only folder that starts with ex. Getting
comfortable using Tab for autocompletion can improve your
speed and comfort with command line tools.
If you want to go “back up,” such as going from example
back to the parent folder java, simply use:
cd ..
The .. means “parent folder.”
Getting started with Java Commands
When you fully install Java to your computer, you can then use command-line Java commands. The first command we always want to test is:
java -version
In our command prompt, we want to type:
java --version
If we did this correctly, you should see something like:
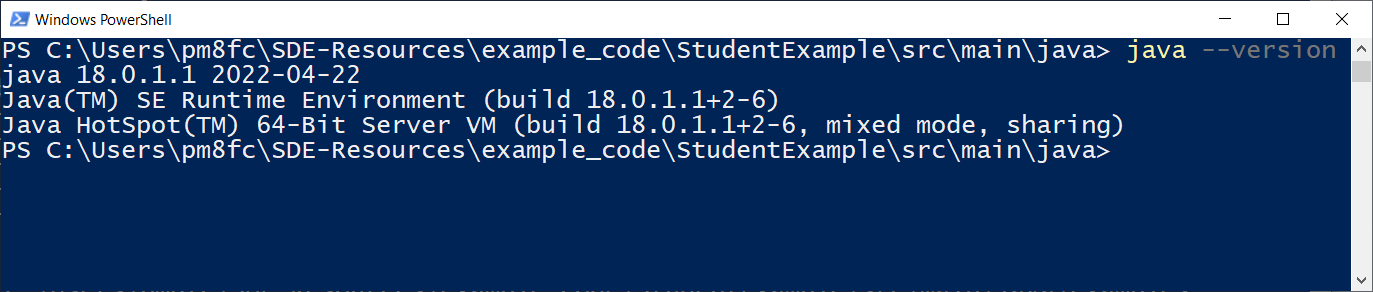
Note that you may have a different version of Java installed than me. For this class, you are required to have Java 8 or later. It is highly recommended to have Java version 17 or later.
If you get an error message saying Java can’t be found, that means your Java is not installed correctly. Either you have not installed a Java JDK, or you have not correctly added it to your system path. The system PATH variable is used to list folders where you have installed programs you want to use from command-line.
If you have installed a newer version of Java, but are still getting the older version number, you either want to check your PATH variable on Windows and Linux and remove the folder for the older java installation from PATH, or on Mac, you will want to change your default JDK and/or uninstall your older JDKs
javac
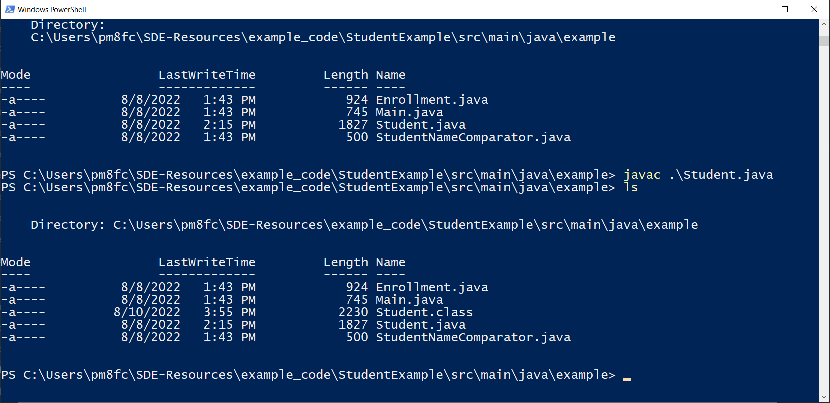
The javac command (think “java compile”) can be used to compile a Java file into a .class file. For instance, I can compile Student.java using the command:
javac Student.java
You can see the before and after in the folder below when I compile Student.java:
To be clear: you will not have to compile java files this
way in class and during homework assignments. My goal in showing
you this compilation is to show you how your IDE works, because
your IDE is running these commands for you in the background. Typically,
your IDE will put your .class files in a folder like build, out
, or bin depending on configuration. In this class, using
our build tool gradle, which we will cover in the Collaboration unit,
your .class files will go in a folder build/classes
Let’s now try to compile Main.java. We’ll use javac Main.java and:
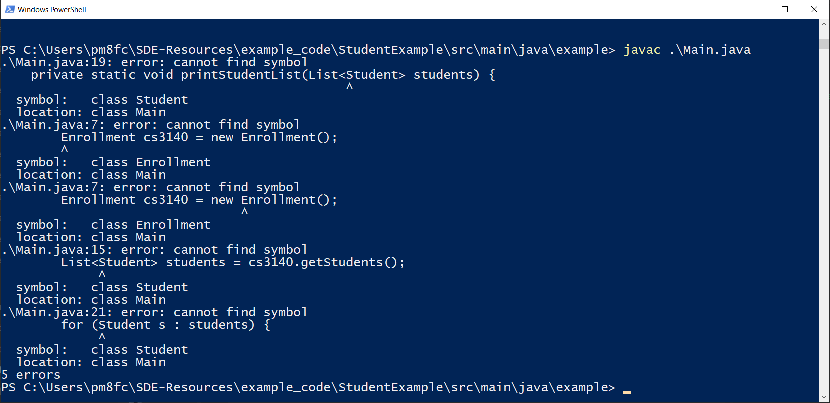
The reason for this error is that the class Main has dependencies to the classes Student and Enrollment. I therefore cannot compile Main.java with the simple command above. I bolded the word dependencies there because that is a very important word that I want you to file away for later. Dependencies are a critical concept not just in compilation, but in design.
This didn’t happen with Student.java, because Student.java doesn’t depend on any other classes in this folder.
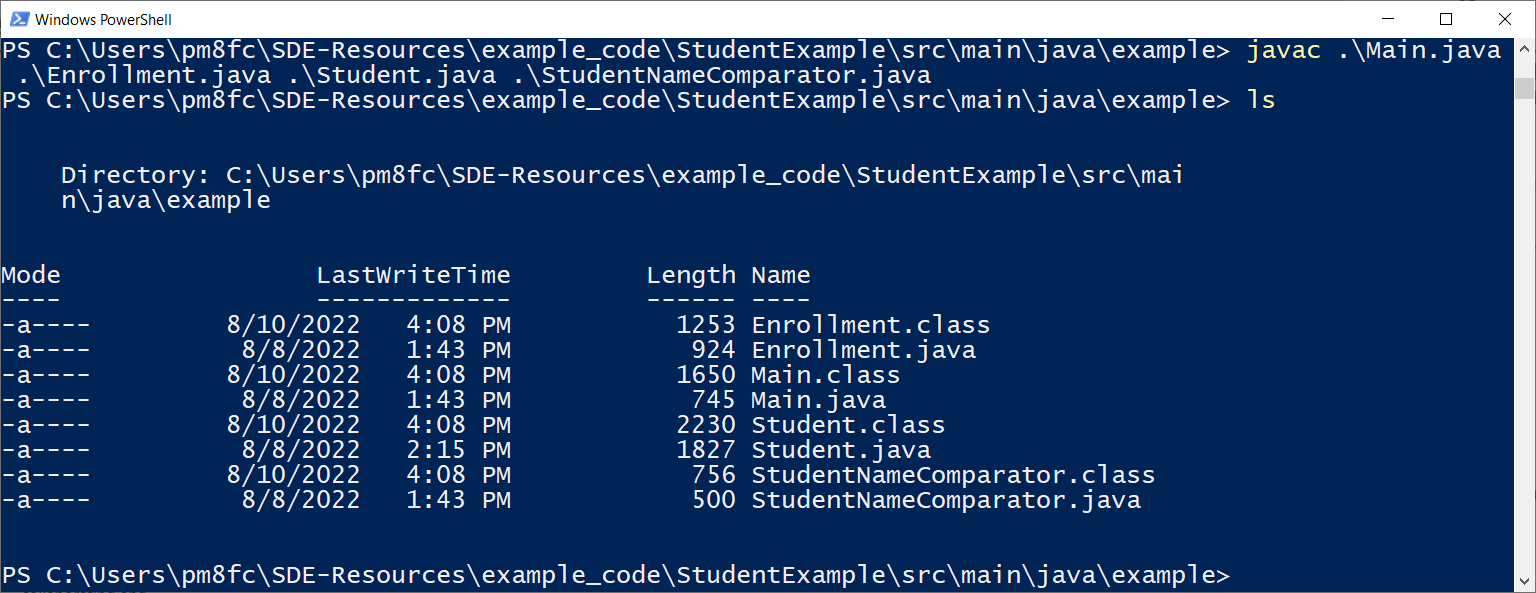
To fix this, rather than compile all of these files one at a time, we can compile all of these files together, and Java will be able to resolve the dependencies during compile time.
javac Main.java Enrollment.java Student.java StudentNameComparator.java
Running .class file
Now that we have the .class files compiled, we can navigate to the parent folder (the one that contains the folder example) and run our Main.class program with the following commands2:
cd ..
This command gets us into the folder that contains the “example” package.
java example.Main

Note that we do not say “Main.class”. The .class is assumed
by Java when looking for the class files. The reason for the example.
before the class name is because in our Main.java is in a package
called example. This is denoted in Main.java:
package example;

import java.util.*;

public class Main {
    public static void main(String[] args) {
        ...
    }
}
The first line tells Java that this class is part of a package called “example”. We can think of this as “in a folder called example.”
We will talk more about packages and why we want them later, but for now it’s sufficient
to think that example.Main means “in the package example, run the class
Main.”
Hidden complexity
It’s worth noting that running the class file in this way comes with a lot of hidden complexity. First, all classes that Main depends on, either directly like Enrollment and Student, or indirectly like StudentNameComparator, must be in the same folder, or in the classpath (basically, the class libraries that the JRE has access to). Additionally, there may be other libraries beyond default Java libraries (like java.util and java.io) that we may rely on if we were building a more complicated program. We will address these complexities later, but the short version is to be thankful to your IDE for handling all of this for you.
.jar files
Another issue with the above code is that if we want to share the executable program Main above, we would have to share all four classes. Main.class is only the bytecode of Main.java, not the other three classes. We would then have to tell whoever we share the code with which .class file to run. This is a finicky approach that requires a lot of effort on the part of the end user.
Instead, wouldn’t it be easier for them if we could send them one single file that contains all of the classes they need, and they just run that?
This brings us to jar files. You can think of a .jar file kind of like a .zip file: it bundles several files together into a single file. In this case, we want to put all four of our class files from the example into a single jar. However, unlike .zip files, we can run .jar files as though they were a single Java class!
We can build a .jar file from command-line; however, this is going to take a bit more work on our end than compiling a single java file.
From our “java” folder above (the folder that contains “example”, where “example” has all of our .java and .class files), we can run:
jar cf MyJar.jar example/*.class
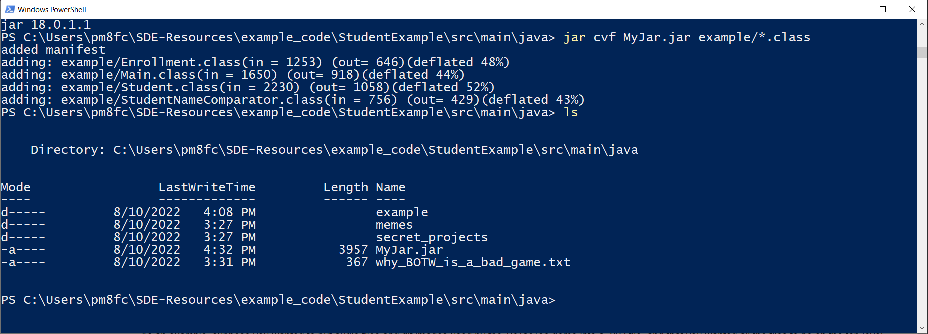
This will create a jar file in our “java” folder called MyJar.jar, and that file will contain all of our classes. However, when we try to run the file with:
java -jar MyJar.jar
…which is the way we can run .jar files with the java command,
we get an error:

The issue here is that while the .jar file does contain all of our classes, we haven’t told Java which file to run when we run the jar! To fix this, we can add the “entry flag” to our command:
jar cfe MyJar.jar example.Main example/*.class
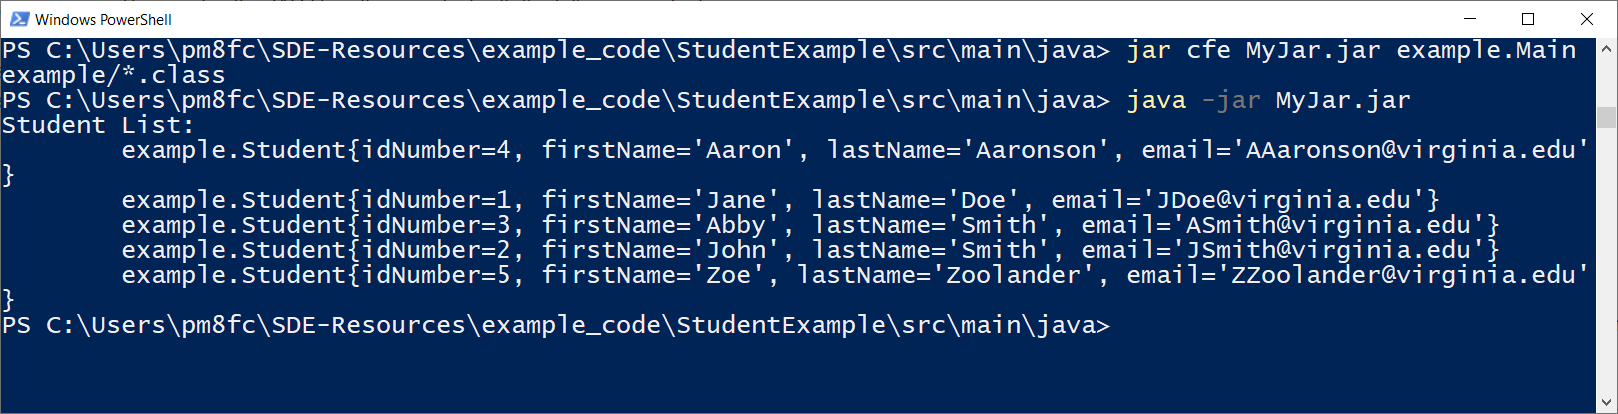
In the above command, notice we added “e” to the argument after jar. This tells the jar tool that we want to change the “entry point” (aka, “Main-Class”) of our jar. The argument “example.Main” tells the jar program which class to set as the Main-Class. Note that the order of the arguments here are relevant, the first argument is the name of the jar, the second argument is the Main-Class, and the third argument is the classes to compile.
Do not worry about memorizing all of these commands. Your IDE is going to take care of most of this. However, for the next unit, you should be comfortable with these two basic commands:
java mypackage.MyClass
java -jar MyJar.jar
We will be using these to run programs with command-line arguments in the next unit.
However, for actually making jar files, we will eventually be using
a tool called gradle which we will cover later. This tool
will add a lot of simplicity to our build process.