IntelliJ
In this module, we will look at the IntelliJ IDE for Java and explore some features.
Contents
- IntelliJ
- Making our first project
- Making our first Java class
- Running a Java file
- Using Packages
- Running with command line arguments
- Test Files
- Important Settings
IntelliJ
IntelliJ is an IDE specifically designed for Java and Kotlin that we will be using in this class. You can download the free IntelliJ Community version here. However, students can get the full version here. - Note that this requires a student email address with a University.
The license has some limits:
- May be used for educational purposes only
- The license must be renewed annually, and can only be renewed while you are an active student
- You cannot share this license with any third parties.
I strongly recommend getting the full version, as some features we will use are not available in the Community version.
Making our first project
After you have installed IntelliJ, go ahead and open it up, and let’s make our first project.
Please pay close attention, as we will be making our projects in a very specific way
in this class using a tool called gradle
First, let’s go to “New Project”. From there, following the settings as explained in the picture and below
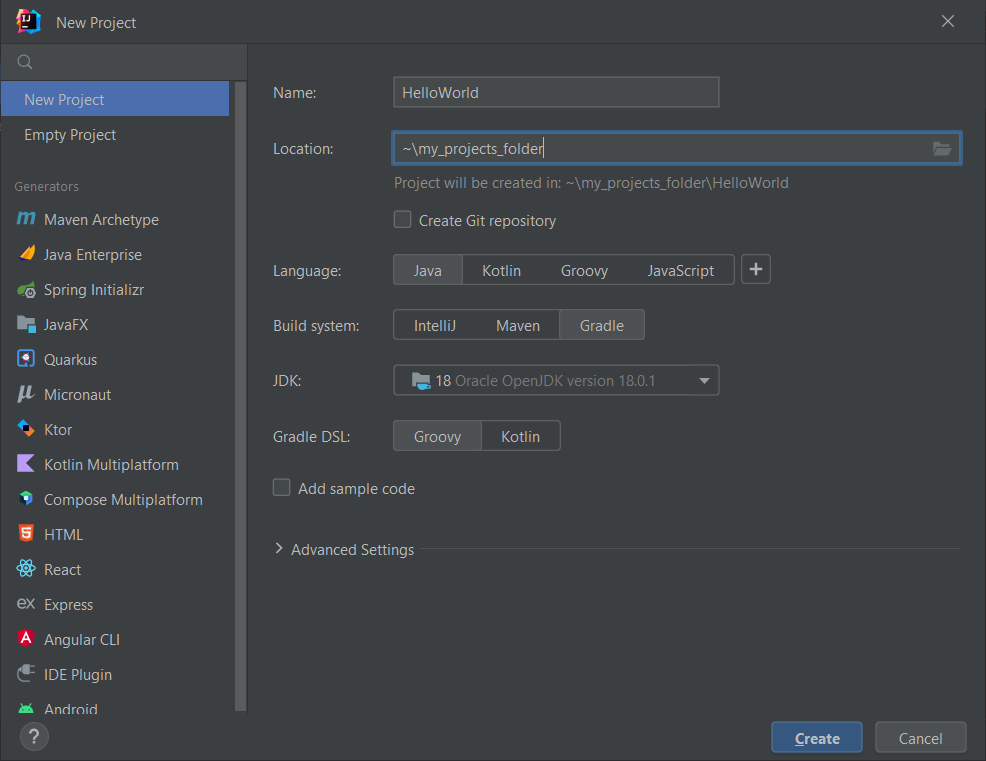
Name: This is the Name of your project. For this one, let’s use HelloWorld
Location: This is one you will set yourself. This is where the project folder is stored. Note that the project itself will be stored in a separate folder inside of Location.
For example, in the above, my Project will be stored in the folder:
my_projects_folder/HelloWorld
You should always keep in mind where your files are stored on your computer, as you may need to access that location with another program, like terminal, git, or your file explorer.
From there, under language, select Java.
Under Build System, select Gradle - THIS IS NOT THE DEFAULT OPTION - we will talk more about Gradle in future modules, but we want to start getting comfortable with it and the structure it produces now.
Under JDK, select the most recent version of Java that you have. You can also download the most recent Java JDK by going to “Download JDK” in the JDK DropDown. At minimum, you should be using Java 8 or later. I recommend using Java 17 or later.
Under Gradle DSL, leave “Groovy” selected.
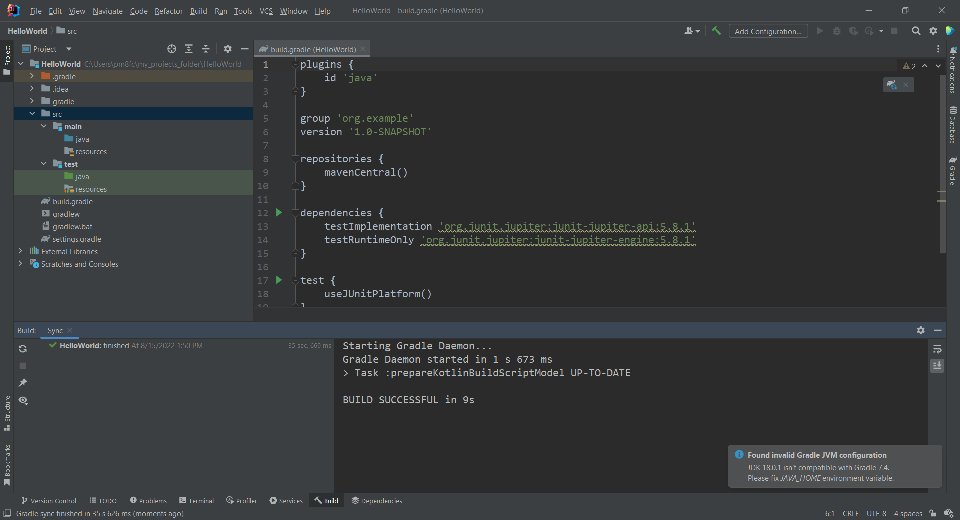
Finally, hit “Create”. After the main Project window comes up, let IntelliJ run for a second, as it sets up the project build environment. When it is done, you should see something like:
Making our first Java class
The first thing we need to know is where to create our .java files. Our source code .java files will go in the folder:
src/main/java
and our test files will go in
src/test/java
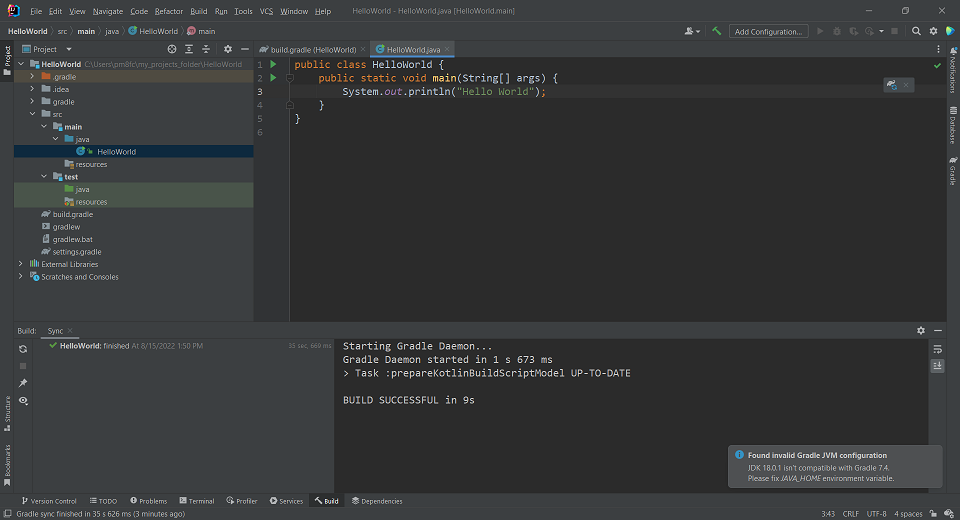
As such, let’s start by right-clicking on our “src/main/java” folder and going to “New”->”Java Class”. Then, leaving “Class” selected, type “HelloWorld” in the class name field. This should create the file inside the correct folder named HelloWorld.java.
At this point, add the following code:
public class HelloWorld {
    public static void main(String[] args) {
        System.out.println("Hello World");
    }
}
You don’t need to save the file, as IntelliJ autosaves as you work with it.
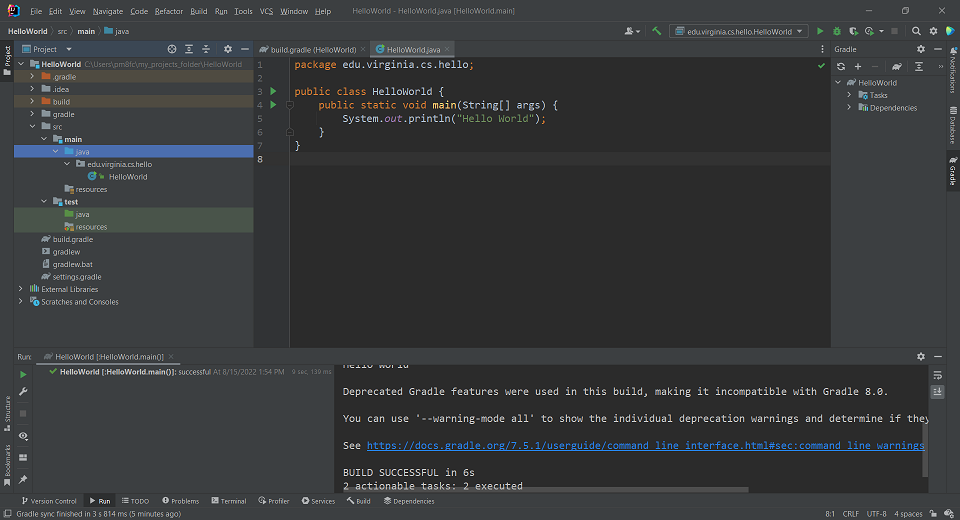
At this point, you should see the following:
Running a Java file
Now that we have our file ready to run, you can run the file by clicking either the “green arrow” sign on HelloWorld or right-clicking in empty space and selecting “Run”.
If you don’t see the option to run, make absolute certain that your main method is:
public static void main(String[] args)
After running, you should see:
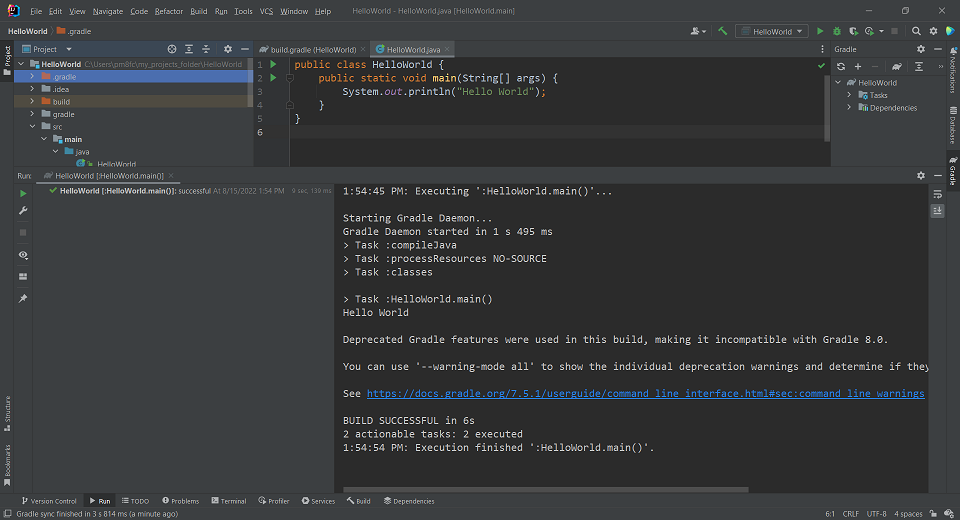
Looking in the terminal, you should see:
Task :HelloWorld.main()
Hello World
You’ll notice a bunch of other tasks above that we will talk about more
when we get to the gradle section
Also, if you get any warnings about deprecated features, like I have here, for the time being you can ignore them. We will talk about deprecation later on in the class.
Using Packages
As we have discussed before, we want all of our code in packages rather than the default package. So, right-click on the “src/main/java” folder and go to “New”->”Package”. Then add the package “edu.virginia.cs.hello”.
After creating the package, click and drag your HelloWorld.java file into the package we have created. A screen will come up asking if you wish to refactor the class into the package, so simply click “Refactor” at the bottom.
You should now see HelloWorld.java inside the correct package:
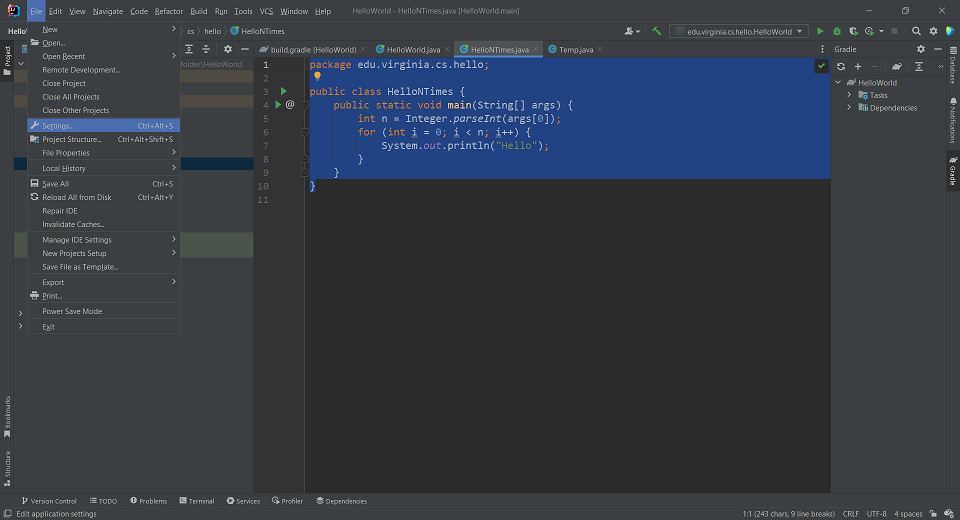
Running with command line arguments
Now we can create another Java file, HelloNTimes.java, inside of our package.
Add the following code to the class:
package edu.virginia.cs.hello;

public class HelloNTimes {
    public static void main(String[] args) {
        int n = Integer.parseInt(args[0]);
        for (int i = 0; i < n; i++) {
            System.out.println("Hello");
        }
    }
}
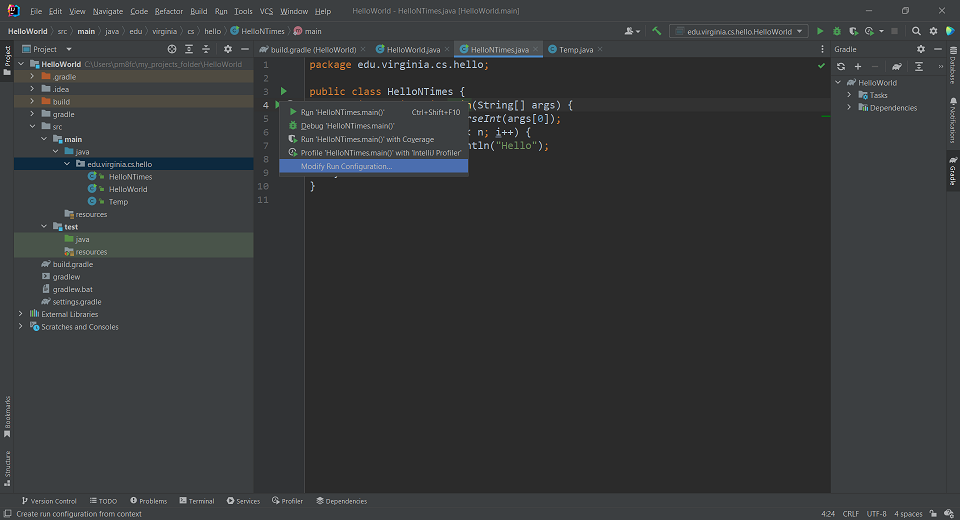
Now, if you were to try to run our program like before, you’re going to have a failure, because we are relying on having a Command-Line Argument that we have not specified. So, right click one of the “Run” arrows on line 3 or 4, and go to “Modify Run Configurations…”
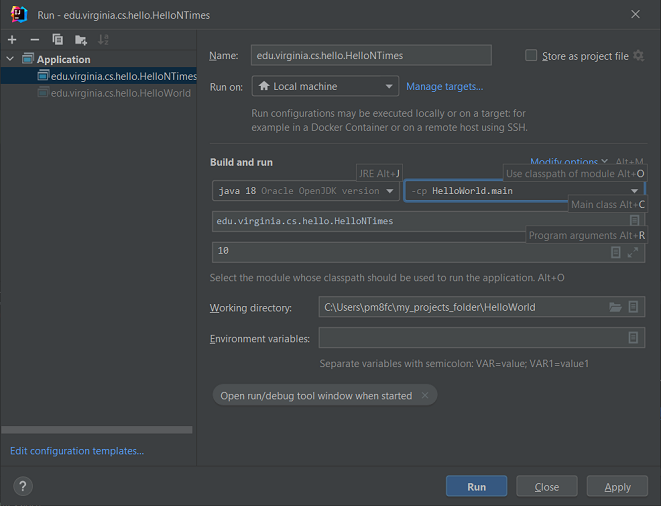
From here, we need to add a command line argument. So in the window that pops up, add the number 10 to “Program Arguments”:
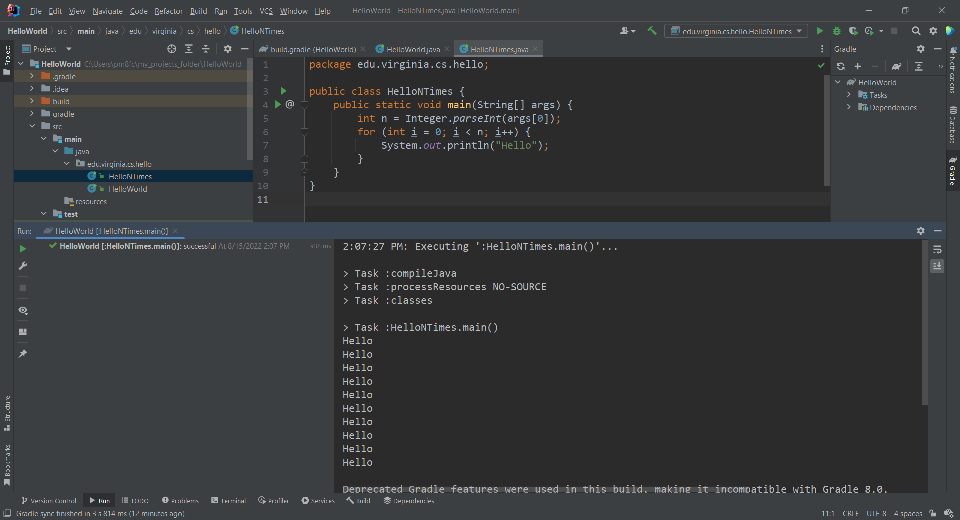
Now hit “Apply” and “Run”
And you should see your program successfully run:
You now have enough to get started with working with Java in IntelliJ! We will come back and talk more about Gradle, and why we use it, in the next unit.
Test Files
We always want to test our code to check if there are any bugs or failures, or if it
is working as intended. Later on, we will talk about JUnit test files. Any code you
write for testing, you will generally want to put into the src/test/java folder,
rather than in the main source code folder. These files won’t be included
when we start building Jar files from our projects to distribute our code.
Important Settings
There are a few important settings you should be aware of in Intellij:
Project Structure
These settings relate to the structure and build information about the project. You may need to edit this information if you are finding compatibility issues.
You can find this window under “File->Project Structure”:
When you click on it, you should see:
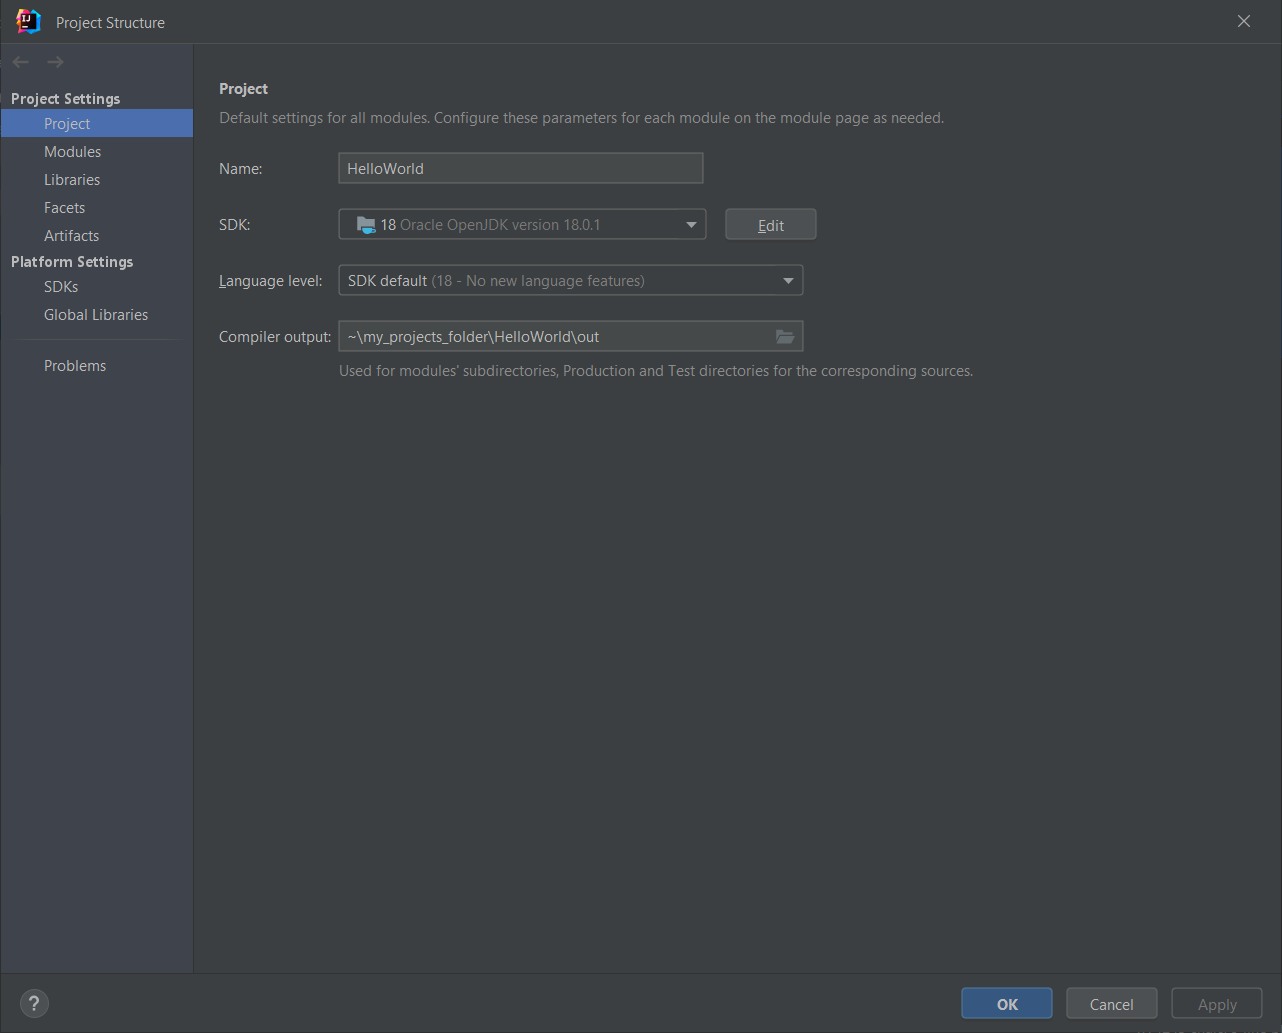
The “Project” window, which is the first that comes up, lets you specific the SDK version which you can change if needed.
From there, you can also set the “Language Level”. Java is backwards compatible, so if, for example, you want to only use features from Java 11 and before, you can change the language level to 11, and your IDE will enforce that Java syntax. Generally, however, it’s recommended to leave the level as the most recent version of Java you have.
We actually won’t have to worry about using any of the other settings in this window for now, but we will come back to it later on.
Code formatting
IntelliJ has a lot of tools to ensure that your code follows Java style and is readable. And using these tools is easy as can be. You can format your code to the default Java style by opening a .java file and going to
Code -> Reformat Code
Code generation
Many of the objects we create are going to have a lot of boilerplate methods like:
- Constructors
- getters
- setters
- toString()
- equals()
- hashCode()
We may also want to include things like copyright boilerplate. IntelliJ can actually generate a lot of this for us.
For example, let’s start by making a class Student.java:
package edu.virginia.cs.hello;

public class Student {
    private int ID;
    private String firstName;
    private String lastName;
    private String email;

}
Now at this point, you may think we need to add all the constructors, getters, and setters ourselves. But this code is so simple, we can let IntelliJ write it for us.
Simply go to Code -> Generate… (or you can right-click and go to “Generate…” or you can simply hit ALT+insert) and select “Constructor”
From there, you can select which fields to include in the Constructor. In this example, I will use all 4 fields. However, you can select a subset. To select multiple fields, You can hold down Control, and select them one at a time. You can tell which fields are selected, as they will be highlighted blue. You can also, instead, hold Shift and select groups. If I generate a constructor with all four fields, IntelliJ will generate the following:
    public Student(int ID, String firstName, String lastName, String email) {
        this.ID = ID;
        this.firstName = firstName;
        this.lastName = lastName;
        this.email = email;
    }
In the same way, you can generate getters and setters (and select exactly which getters and setters you want to exist.) If, for example, you want to give getters and setters to every field except ID, where you only want a getter, then Generate…-> Getters and Setters - select firstname, lastname, and email, and then Generate…-> Getters - select only the id field.
You can generate toString() in the same way, selecting which fields you want to display. Additionally, you can generate equals() and hashCode() by specifying which fields you want to use to identify equality.
All this helps speed up the process of writing the boring boilerplate code and lets you get into writing the interesting parts of your software system.