Source code example
Note that you are not expected to understand all of the source code in this project. We will be focusing on the build files and the structure only, not the source code itself.
Gradle
In this class, we will be using the gradle build tool.
All code released in this course is released with a gradle build, and all homework in this course will be required to be build-able via gradle.
The ease of gradle
For today’s example, I have an open source project, which is the start of a project for parsing out stats from the National Basketball Association (NBA). Currently, this project produces an Excel spreadsheet of all NBA Teams.
Let’s say you wanted to contribute to this project, adding things like team stats, player stats, records, etc. How could you do that? Well, first you need to download the project. So you go to a folder where you want to put the code, open a terminal, and type:
git clone https://github.com/sde-coursepack/NBAExcelTeams.git
Note that you may not have git installed yet, and so you may not be able to follow along. That’s fine, as you don’t need to today. Just understand that the above command will download the repository on that Github page.
But now, if you try to run cs.virginia.edu.nbateams.Main right away, it won’t
work. Because I only distributed the source-code, not the byte-code .class files.
And if you try to compile, you won’t be able to. That’s because this project has several dependencies:
- JUnit Jupiter for testing
- Mockito for mocking during unit testing
- Apache POI for reading from Excel Files
- Org.json for reading JSON
Do you need to find all of those libraries and download them yourself? Well, if we weren’t using gradle, you might. However, lucky for you, we are using gradle, and that makes this process very simple.
Simply, after cloning, stay in your terminal, and type:
cd NBATeams
.\gradlew build
And then, sit back, relax, and let gradle do all the work! Gradle will:
- Download all the dependencies
- Compile all the code for you
- Run the existing test suite to make sure there are no known failures
- Build the output jar file for you to use.
It will also automatically optimize this build process. All the dependencies already downloaded? Well, no need to download them again. No code changes since your last build? Well, no need to recompile or re-test.
Once gradle finishes building, you will find a .jar file in the build/libs
folder inside of your project named NBA-Excel-1.0.jar.
You can now cd to that folder and run that .jar file with:
java -jar NBA-Excel-1.0.jar
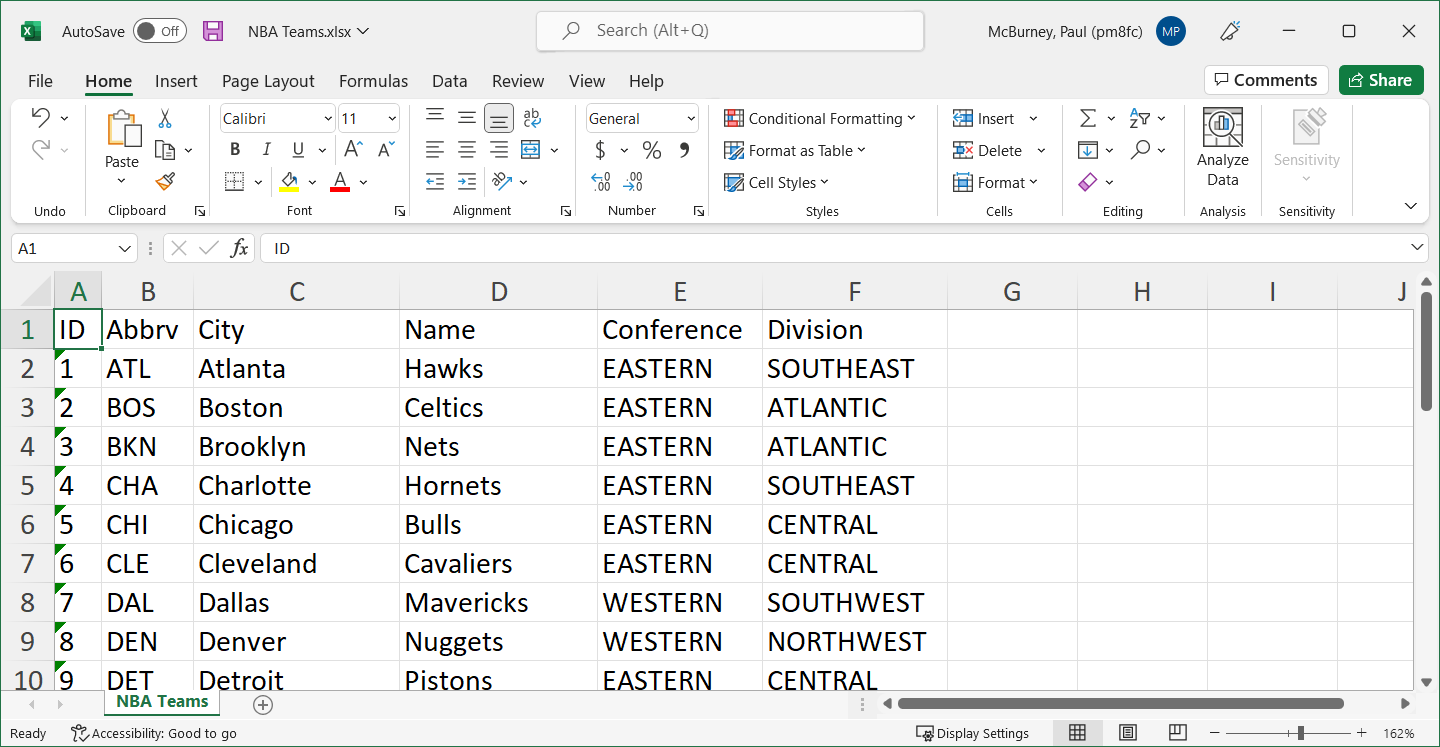
And a file named “NBA Teams.xlsx” will show up in that folder! If you open it in Excel or Google Drive, you’ll see the results:
So with just a git clone, a cd, and .\gradlew build, we can immediately
have the code downloaded, built, and working, ready for us to edit it! You’ve
been onboarded and are ready to start contributing code!
Gradle project structure
A Gradle project has a strict structure.
Root directory
The root directory is the project’s root folder. For example, when I open this project in IntelliJ:
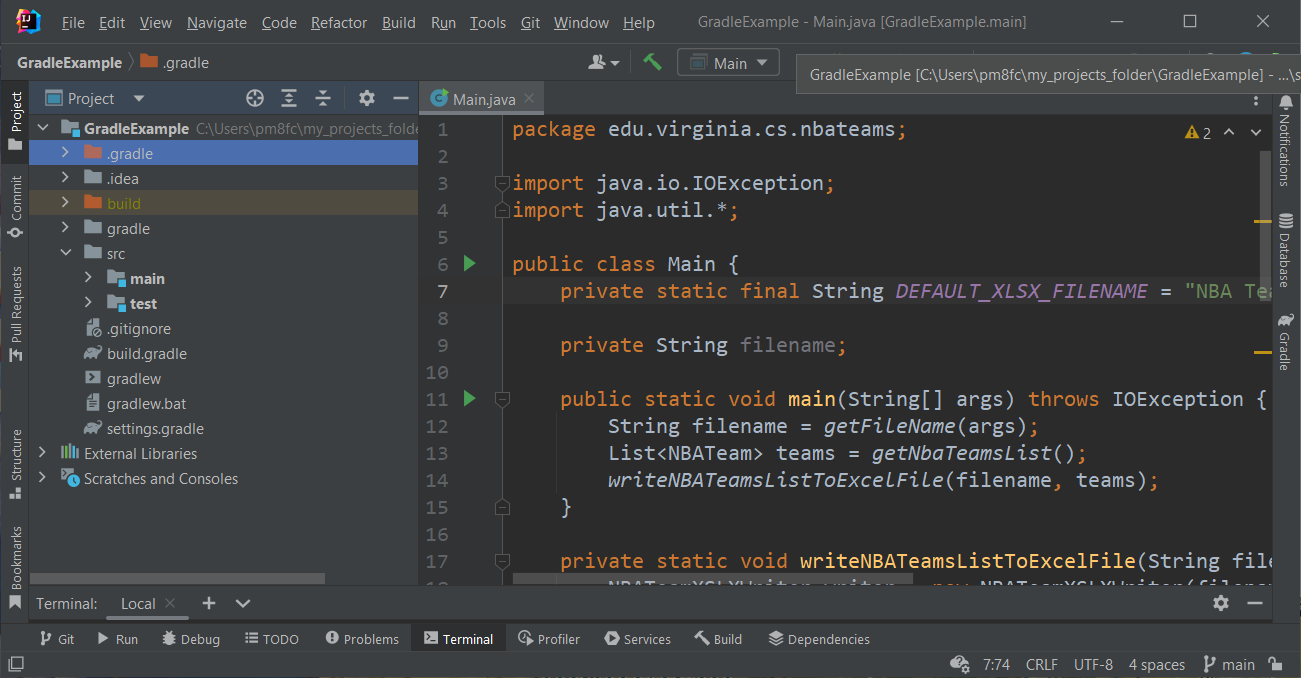
On the left side, on what we call the Project Pane, you can see the file structure of the project. “GradleExample” is our root directory.
src folder
The src folder contains all of our source code, both for running (src\main\java)
and for testing (src\test\java). All of our source code will
be inside this folder somewhere.
gradle/wrapper
You’ll also see a folder called gradle which contains a folder called wrapper.
We will talk about the Gradle wrapper below.
build folder
The folder build contains all of the generated files when building the
project, including the .class files, .jar files, test results, etc.
We never share the build folder publicly, and instead generate its contents
whenever we run .\gradlew build.
gradle files
The files build.gradle, settings.gradle, gradlew, and gradlew.bat are files
needed for gradle to function correctly. The most interesting of these is
build.gradle which acts as a type of “script” for how your project is built.
settings.gradle is also worth looking at briefly. We will look at both of these
in detail in the next two sections.
other files and folders
As a general rule, folders and files starting with a dot, like .gitignore are
special files that serve specific purposes.
.gitignoreis an important file related to Git that we will discuss in that unit.ideais for settings related to the IntelliJ IDEA, which is the IDE I am using for this project.gradlefolder contains settings for gradle related to ourgradlewcommand
build.gradle
This file acts as the beating heart of the gradle build. Let’s take a look at it’s contents piece by piece. You can see the build file for this project on Github.
The build.gradle file is written in a domain-specific language using Groovy. However, you don’t need to learn Groovy to work with gradle, as it’s designed to be very readable and modifiable.
plugins
The core plugins are used to describe the major aspects of the project to gradle. Here, we simply have:
plugins {
    id 'java'
}
This just tells gradle that our project uses Java. There are other plugins like
kotlin if we wanted to use that language, or eclipse if we want to use
the Eclipse IDE. There is technically a plug-in for IntelliJ, idea, but we
don’t actually need it. That said, if we wanted to add it, we could just
change this to:
plugins {
    id 'java'
    id 'idea'
}
The reason we don’t need to add this is that IntelliJ already integrates with Gradle on its own very nicely, which is one of the reasons I recommend it over Eclipse in this class.
Dependencies and Repository
Arguably, the sections that are the most important to understand are the
repositories and dependencies sections.
repositories {
    mavenCentral()
}
This tells Gradle that you want to download all references from the Maven Central repository. This is, by far, the most used and largest repository of Java libraries, so you will basically always have this and never change it.
dependencies {
    implementation group: 'org.json', name: 'json', version: '20220320'
    implementation group: 'org.apache.poi', name: 'poi-ooxml', version: '5.2.2'
    runtimeOnly group: 'org.apache.logging.log4j', name: 'log4j-core', version: '2.18.0'

    testImplementation 'org.junit.jupiter:junit-jupiter-api:5.9.0'
    testImplementation group: 'org.mockito', name: 'mockito-core', version: '2.1.0'
    testRuntimeOnly 'org.junit.jupiter:junit-jupiter-engine:5.9.0'
}
This lists all the external libraries we are using. You’ll see:
- json - used for parsing json text
- poi-ooxml - used for generating an Excel spreadsheet
- log4j-core - used by poi at runtime
- junit-jupiter-api - used in source code for writing tests
- mockito - used in testing to more precisely test specific features
- junit-jupiter-engine - used at runtime for executing tests
Now, you do not need to fully understand what each of these libraries do for this lecture. The key here is to understand the point of this section, which is to tell gradle:
- Which libraries do we need
- Which versions of those libraries do we need
So, for example let’s look at the poi-ooxml dependency:
implementation group: 'org.apache.poi', name: 'poi-ooxml', version: '5.2.2'
This tells gradle that “in order to compile our source code,
we need the poi-ooxml library. You can find it on the Maven
Central repository under org.apache.poi. Please get version 5.2.2.”
Don’t worry too much about the word at the start of the line. It will either be:
- implementation - the source code relies on this to compile
- runtimeOnly - I only need this resource at runtime
- testImplementation - only the testing code relies on this to compile (src/test folder)
- testRuntimeOnly - I only need this when running the tests
If you are ever in doubt, just use implementation. Anything tagged as implementation will be accessible in both main and test, both at compile-time and run-time. However, anything tagged as testImplementation will not be accessible in main. Generally, you’ll typically only see things like JUnit and Mockito in the testing dependencies.
To add a new dependency, you can simply go to the Maven Central Repository or alternatively to MVNRepository – whichever you prefer from an interface standpoint, as they both link to the same libraries – and search for the library you want. From there, click on the version you want (typically the most recent). Both websites will then show you the Maven and Gradle text you need to add that dependency:
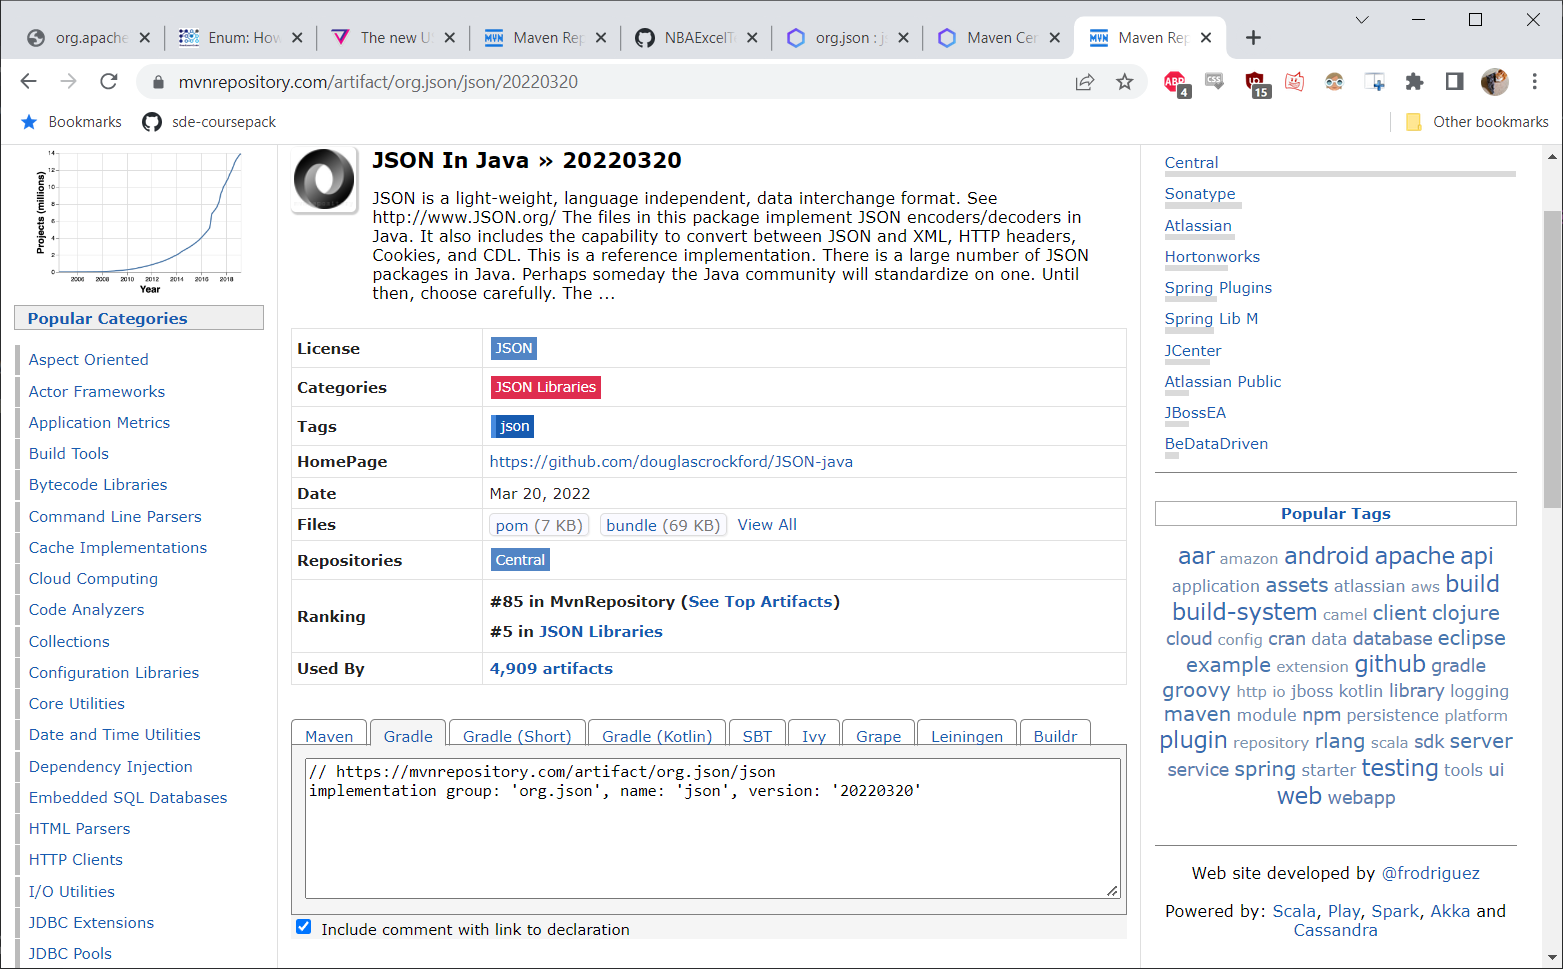
Note that you may need to scroll down to see the Gradle command on the Maven Central Repository, or select the Gradle tag on MVNRepository. You do not want to copy the Maven XML text.
test
This tells gradle how to execute our tests.
test {
    useJUnitPlatform()
}
In this class, you’ll never use another testing platform, so you can just leave this as is.
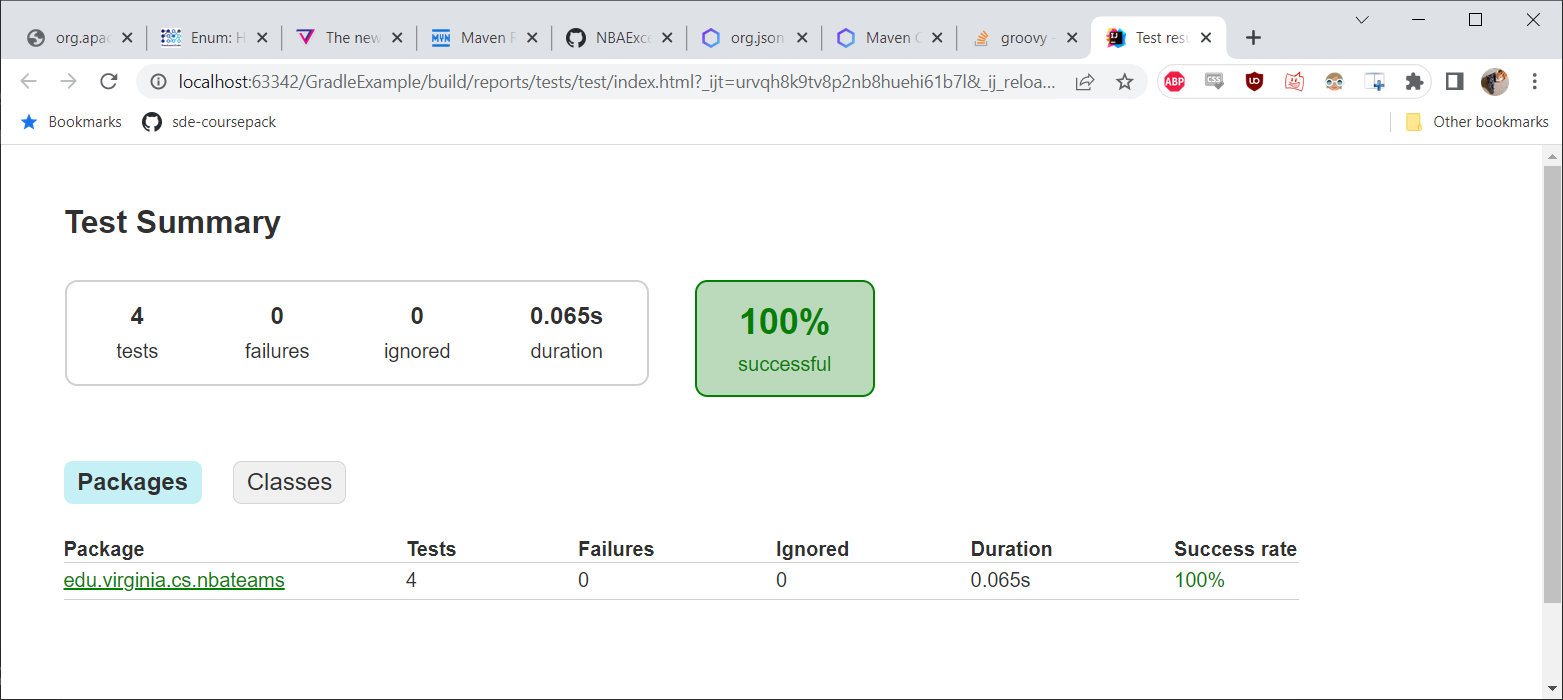
You can run the tests separately from the rest of the build
process with .\gradlew test. When testing, a formatted HTML page
will be generated at:
build\reports\tests\test\index.html
You can open that file with any browser (Safari, Chrome, Firefox, etc.) to see a test report.
jar
This task tells gradle how to build our output jar file.
jar {
    archivesBaseName = "NBA-Excel"
    duplicatesStrategy = DuplicatesStrategy.EXCLUDE
    manifest {
        attributes "Main-class": "edu.virginia.cs.nbateams.Main"
    }

    from {
        configurations.runtimeClasspath.collect { it.isDirectory() ? it : zipTree(it) }
    }
}

group 'edu.virginia.cs.nbateams'
version '1.0'
archiveBaseName is simply the name of the output jar file. The name will
by default have the version number appended. This means our .jar will be named
NBA-Excel-1.0.jar.
group is useful if we want to deploy our .jar file on Maven or something like
that. I tend to just set this to my Main class, or whichever class contains the
main function.
duplicatesStrategy is something that could be relevant in more complicated development
settings, but for the sake of this class, just leave it as DuplicateStrategy.EXCLUDE.
You’ll always want this whenever you are making a “fat-jar” like we are.
manifest is where we define the properties of our jar Manifest. Whenever
you are releasing a runnable jar, then you absolutely must include the
attributes "Main-class" item. This should be set to the package name and class name
of your main class. In my code, the main method is in Main.java in the package
edu.virginia.cs.nbateams.
fat-jar
The idea of a “Fat Jar” is a jar that contains not only my own code, but also
all of the dependencies of my code. This is important because if I didn’t include
the dependencies in my jar file, I would need to separately run the java -jar command
with additional arguments to specify where to find those dependencies. While doable,
this is complicated and beyond what we need in this class. The purpose of:
from {
    configurations.runtimeClasspath.collect { it.isDirectory() ? it : zipTree(it) }
}
…is simply to tell Gradle “Hey, include all the dependencies in the jar file.” You will want to check the licenses of any libraries you use to ensure that you have a right to redistribute them. For the libraries I have selected for homework assignments, I have ensured that the License allows redistribution.
gradle build
First, notice the above is not .\gradlew build, we’ll talk about why in
a second.
The command gradle build tells Gradle to execute the build script,
build.gradle. Generally this means make sure the project has the necessary
dependencies, compile the code, run the tests, and build the jar file.
Gradle wrapper
Now, all of the above assumes someone has installed gradle on their computer.
What if they haven’t? Do they have to download it, figure out how to set it up
on their PATH variable, etc.? This is where the gradle wrapper comes into play.
In each gradle distribution, there should be a wrapper included. This will automatically
install gradle for you just by running .\gradlew build
MAC USERS: If you are getting a permission denied error when running .\gradlew build
or any other .\gradlew commands,
this means that the gradlew doesn’t have execute permissions. This can
be changed by simply running in the same folder:
chmod +x gradlew
And then run .\gradlew build
.\gradlew build
.\gradlew build does basically the same thing gradle build does, but you
don’t have to have gradle installed on your computer. The first time you
run a .\gradlew command, the program will automatically install
the correct version of gradle for that project (not to your computer
as a whole). This is beneficial, because now if you have multiple projects
on your computer that use different versions of gradle, you don’t have to worry
about it! In fact, you never have to manually install gradle at all.
The one limitation of this is that if you want to create your own project as gradle, you will either need to install gradle yourself or use an IDE that will install gradle for you (like IntelliJ). However, this means that the only dependency your project has that you must install on your own is the JDK (which IntelliJ can also do for you). Everything else, including external libraries, is going to be described in the gradle file.
Note that there are some limits to this. For example, if you want to work with Android Studio projects, you still have to install Android Studio on your own. However, we won’t be working with Android Studio in the course.
Conclusion
The point of gradle is to ease both the build-process and the setup-process. All you need to do to build a gradle project you find on github is:
- Download it (
git clone) - Open the project (either in your terminal or your IDE)
- Build it (run
.\gradlew build)
And you’re ready to go!